Battle of Bannockburn – A Stirling Scottish Victory
The Battle of Bannockburn was one of the most significant military clashes fought between the Kingdoms of Scotland and England. Occurring between the 23rd and 24th of June 1314, it was the battle to culminate the First War of Scotland Independence. The war had begun 18 years prior when King Edward I of England invaded Scotland and deposed King John Balliol, seizing control of the country as he did so. King of Scots, Robert the Bruce, would lead his army to victory over the English at Bannockburn, thus securing Scottish independence. Most remarkably, the Scots managed to defeat an English invasion force of roughly 20 000 men with a fighting force of only 6 000 soldiers. If you are interested in learning more about this pivotal moment in the history of medieval Europe, you have found yourself in the right place. Join us as we explore what led to the Battle of Bannockburn, how it unfolded, and what its outcomes wrought.
Significance of the Battle
| Name of the battle | The Battle of Bannockburn |
| Overarching conflict | The Wars of Independence |
| Date | 23rd – 24th June 1314 |
| Location | Bannockburn, Scotland |
| Combatants | Scotland versus England |
The Battle of Bannockburn took place on Scottish soil in Stirling. Lasting for two days, the conflict saw an invasion force of approximately 20 000 English soldiers, led by King Edward II, face off against the roughly 6 000 troops under the command of Robert the Bruce. Fearing a stalemate on the second day of battle – something that the Scots could not afford – Robert ordered his army to engage their enemies in a surprise attack that ultimately sent the English into retreat. Today’s approximations place the English death toll at around 11 000, a staggering number considering their larger fighting force. More remarkably, it is believed that the Scots suffered no more than 500 casualties.
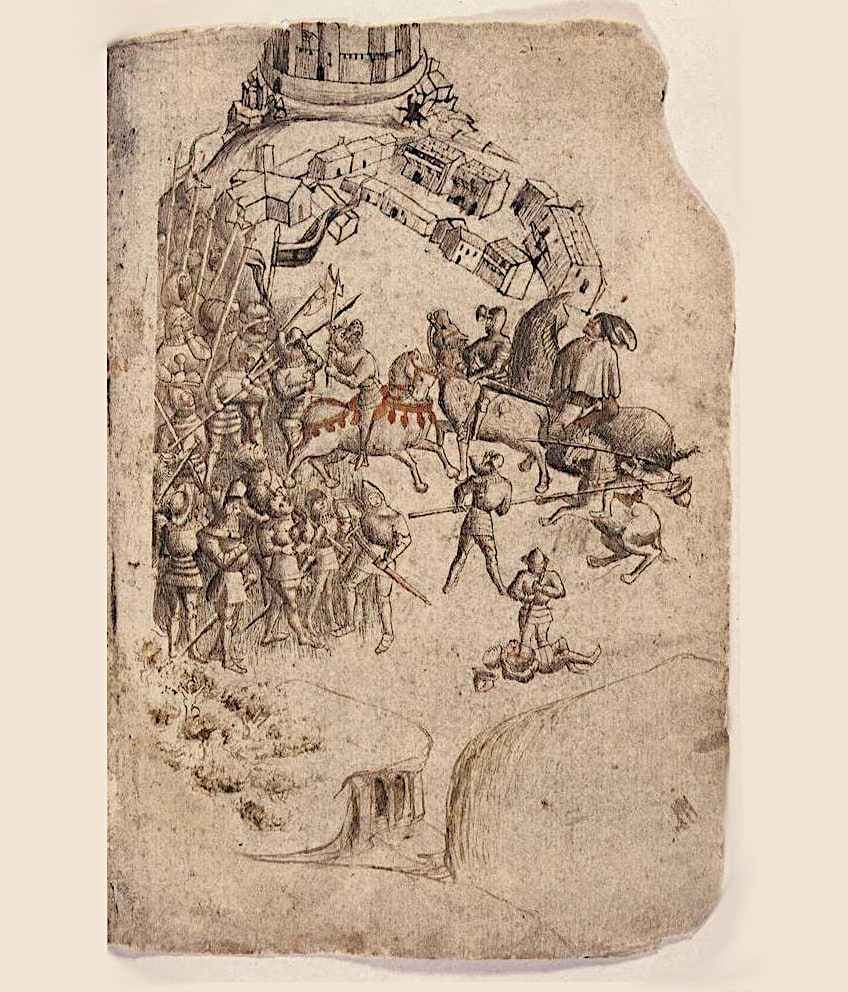 Earliest known depiction of the Battle of Bannockburn (1440’s); See page for author, Public domain, via Wikimedia Commons
Besides the Scottish being victorious despite the seemingly insurmountable odds they faced, there are several other reasons why the battle was so significant. The battle’s influence on the military tactics applied during Europe’s medieval period would be resounding. The Scots’ use of schiltron formations, which were defensive clusters of tightly packed soldiers armed with spears, would prove to be one of the most effective tactics of the period.
Following their victory over England, Scotland would herald King Robert the Bruce as the savior of their culture and sovereignty. With this decisive battle behind it, Scotland would solidify its independence as a nation separate from England. To this very day, the Scottish people still harken back to the Battle of Bannockburn as a symbol exemplifying their freedom.
Breakdown of Events
The Battle of Bannockburn did not occur in a vacuum. There was much that happened several years prior that ultimately led to the conflict. If you are looking for a brief run-down of these events, we have one for you right here.
- Robert the Bruce was crowned King of Scotland in 1306, a position that he solidified through slaying the previous king, John Comyn. This caused a civil war to break out in Scotland, which the English exploited to install a proxy who was loyal to England.
- In 1314, the King of England, Edward II, rode an army of roughly 20 000 soldiers into Scottish territory. Hoping to put an end to the Scottish uprising against England’s meddling, he began first by besieging Stirling Castle.
- Robert the Bruce rode with an army of roughly 6 000 men to relieve the Castle. His army later engaged the English king and his men in Bannockburn.
- The Scottish army mustered their defensive positions in the treeline neighboring a marshy plain, assembling their schiltrons at the front line. Schiltron formations were composed of spearmen densely packed together, the benefit of which was that they were near impervious to assaults from cavalry charges.
- The English army was unsuccessful in their attempts to attack the Scottish schiltrons using cavalry charges. The spearmen of the schiltrons would use their pikes to impale the horses of the charging knights, forcing the riders off their mounts.
- The English army attempted to disrupt the fortitude and momentum of the Scottish schiltrons to no avail. The Scots used their own archers to deliver counterattacks.
- The English saw marginal gains against the Scots but the advance did not hold up. Robert the Bruce was able to rally his soldiers and successfully repel the attacks.
- When the second day of battle came, the English forces had moved west where they intended to give battle. The Scots had dammed the Bannockburn upstream to make fording near impossible, making it more difficult for the English to coordinate their attack.
- From the west, the English army attempted several frontal assaults against the schiltrons, all of which failed. The Scottish schiltrons held firm, and the English cavalry charges were repelled time and time again.
- The English army was eventually forced into a retreat which later became a routing of their numbers as the Scots gave chase. King Edward II’s army sustained heavy losses during their flight from Bannockburn.
- The total number of casualties sustained by the English was roughly 10 000 whereas the Scots lost no more than 500 men. The English army lost many high commanders and even Henry de Bohun, a nephew to the King of England, was among the dead.
- The Scots won a decisive victory against the English and the day was a resounding turning point in the First War of Scotland Independence. The Scots had successfully driven the English out of their lands and no longer faced the threat against their sovereignty.
- This remains one of Scotland’s most iconic moments in history. To this day, it is still viewed as a symbol of their struggle for independence as a nation.
Events Leading Up to the Battle of Bannockburn
The sequence of events that eventually led to the stand-off between the armies of Kings Robert and Edward II was long and deeply complex. It involved a litany of conflicts and even alliances between the two nations.
Troublesome Succession
The true origins of the conflict, however, can be traced back to the year 1283. Following the death of the childless Scottish king, Alexander III, there would be no clear heir to succeed the throne. The most likely successor would be Margaret of Norway, his ailing granddaughter. Old and frail as she was, however, her death came whilst en route to Scotland in 1290. This created a power vacuum in Scotland, and would later prove itself to be the foundation upon which the later events would develop.
Following Margaret’s death, there would be no fewer than 13 claimants to the throne of Scotland. And with a miasma of indecision and infighting permeating through the country, King Edward I of England himself was called upon to arbitrate the matter. Understanding that this would be a golden opportunity to assume control of Scotland as he had both Ireland and Wales, he would lend his support and favor to John Balliol, who at the time Edward believed would serve as his loyal vassal.
However, Edward’s demands of both gold and manpower to assist in England’s ongoing conflict with France would wear this loyalty down to a breaking point by the year 1295. Tired of Edward’s incessant requests, the Scottish nobility would soon convince their king to rebel against England and initiate a defense pact with France. Outraged and humiliated by the betrayal, Edward would march to meet Balliol and his army in battle.
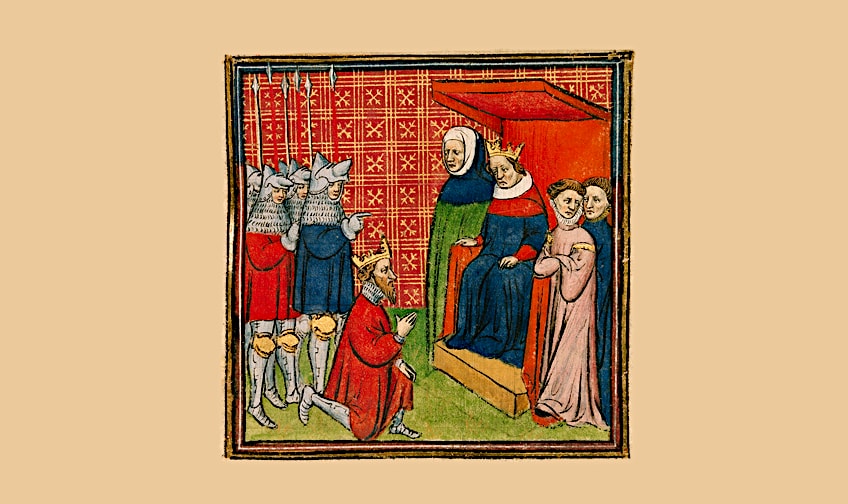 Manuscript illumination depicting King John king of Scotland greeting Edward I (14th century); Virgil Master and his atelier, Public domain, via Wikimedia Commons
Being one of England’s most capable monarchs, Edward saw great success during the campaign, beating Balliol at Dunbar before locking the Scottish king in the Tower of London. Along with his incarceration, John Balliol was also forced to yield large swaths of the Scottish south to England. This is considered by many to be the beginning of the War for Scotland Independence.
Revolution Reignited
Wallace gained notoriety after he killed the English sheriff of Lanark in 1297, in retaliation for the sheriff’s murder of Wallace’s wife. He then led a Scottish rebellion against English rule, gathering a large army of supporters from across Scotland.
Despite the English forces left to guard the newly captured Scottish land being well-garrisoned, a historical icon would emerge to fan the flames of rebellion. A man by the name of William Wallace would rise to prominence after slaying the Sheriff of Lanark in 1297 as an act of revenge for the death of his wife. He would soon thereafter find himself at the fore of a Scottish rebellion against the Anglo-Saxon occupancy, amassing a large enough army to win a decisive victory at the Battle of Stirling in that same year. Soon thereafter, Guardianship of the realm would fall to him.
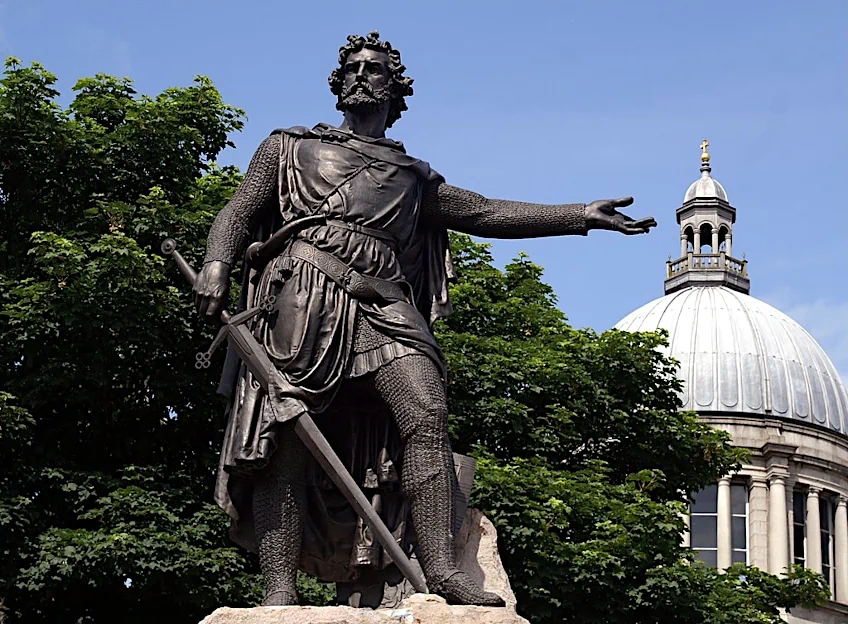 Statue depicting Willian Wallace by William Grant Stevenson (1888); Axis12002 at English Wikipedia, Public domain, via Wikimedia Commons
Although this did much in favor of the Scots’ war for their freedom, Edward I was determined to undermine the growing seed of revolt mustering north of his borders. With a substantially larger fighting force compared to Wallace in tow, Edward marched to Falkirk where he crushed the Scots only a year later. As for the freshly minted revolutionary, Wallace was shortly thereafter captured by the English. By 1305, he would meet his end via an execution through hanging, drawing, and quartering.
Robert’s Rebellion
By 1306, the Scottish crown continued to gather dust. At this point, Robert the Bruce would bring himself into the picture after slaying his rival, John Comyn III as a means through which to establish a bid for the vacant throne of Scotland. As a great-great-grandson of David I, we would then claim the crown of Scotland with the support of both the church and a sizable portion of the Scottish nobility.
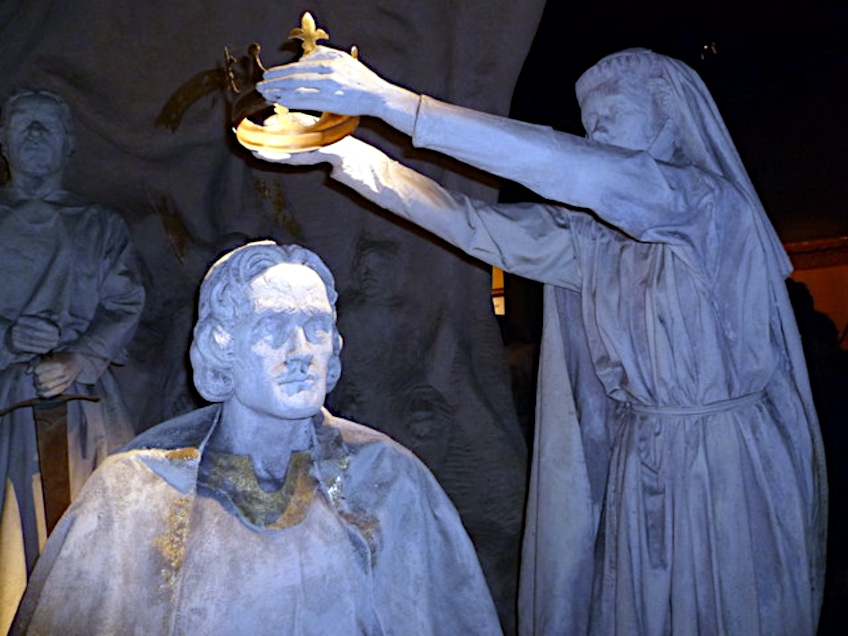 Isabella MacDuff, Countess of Buchan crowning Robert the Bruce king of Scotland at Scone in 1306; Kim Traynor, CC BY-SA 3.0, via Wikimedia Commons
Although his dream of Scottish independence burned deeply in his heart, his rebellion saw fruitless attempts in securing sovereignty during the early stages of his rule. During the Battle of Methven, which occurred in that same year, his army would suffer immense losses following its defeat against Aymer de Valence. The battle would prove a crushing blow to Robert, who would lose the bulk of his most loyal followers in the armed exchange.
After losing most of his fighting force during the routing of his fleeing army, Robert would flee to the neighboring Island of Rathlin where he sought refuge and consolidated his remaining power. Most unfortunately for him, however, the English used his absence from the continent as an opportunity to capture his wife and three daughters. To make matters worse, his captured brother would also be executed at Berwick.
After amassing a small fighting force, Robert decided to sail back to the mainland with the intention of harassing the English still occupying his country. At the same time, his two younger brothers sailed to Galloway with similar intentions as a means to weaken the bonds between Carlisle and Ayr. Tragically, however, both brothers were ambushed upon arrival where they were captured and shortly thereafter executed.
A Fighting Chance
Luckily for Robert, however, his own campaign got off to a good start. Not only did he defeat the English at Glen Trool, but he also won a significant victory at the Battle of Louden Hill the benefits of which were twofold. Firstly, the victory allowed him to reassume control of large swaths of Scottish territory from the English. Secondly, it allowed him to amass a substantially larger following and fighting force.
Better for him yet, Edward I would die in July of that same year. Whilst on his way to Scotland to launch yet another campaign against Robert, the English king, known at the time as “Hammer of the Scots,” would fall ill in Burgh-by-Sands, near Carlisle, and lose the steam required to venture forward. He would perish shortly after returning to England.
A Frivolous Successor
Edward I would then be succeeded by his son, Edward II, who lacked in all regards the strength of character that allowed his father to achieve such political and military success during his reign. Instead of focusing on Robert’s fast-growing consolidation of power in Scotland, the immature and flippant young king would waste much of his time attempting to garner favor and friendships within the English court.
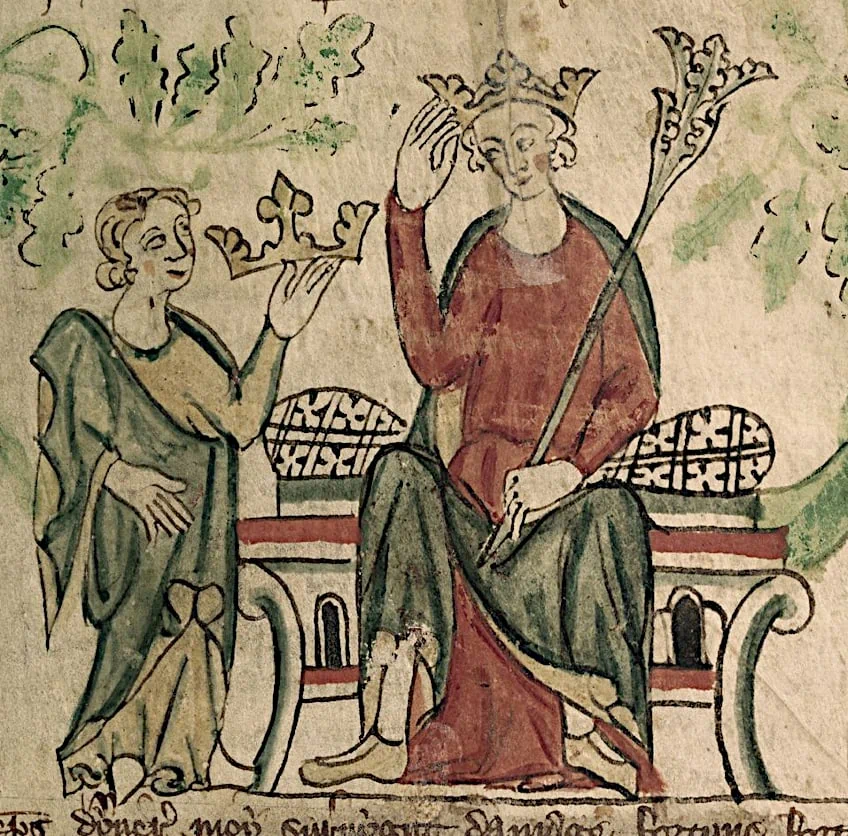 Detail from an illuminated manuscript depicting Edward II of England receiving his crown (between c. 1307 and 1327); British Library, Public domain, via Wikimedia Commons
The distracted king inadvertently allowed Robert more than enough time to cement his position as king back home. Without English intervention, Robert was able to defeat his rivals either in court or on the battlefield until his grasp on the northeast of Scotland was beyond contest. With so much power at his fingertips, it did not take long for him to gain the support of noblemen from every corner of Scotland.
With his position as the King of Scotland now firmly in place and incontrovertible, Robert could now revert his attention back to his primary goal of driving the English occupiers from his lands. In the years that succeeded, Robert managed to recapture lands and strongholds from the English. By the time 1314 rolled by, only the castles of Stirling and Bothwell remained in the possession of England – a far cry from what it owned during the reign of Edward I.
The Stirling Conundrum
Isolated as it was, the Bothwell stronghold presented no immediate threat against Robert’s plan to reunify Scotland. Stirling, however, was a thorn in his side that needed removal to secure his vision. He entrusted the sieging of Stirling to his brother, Bruce, who would reach an agreement with its leader, Philip Mowbray, that the castle would voluntarily capitulate should a relief force not arrive by the 24th of June.
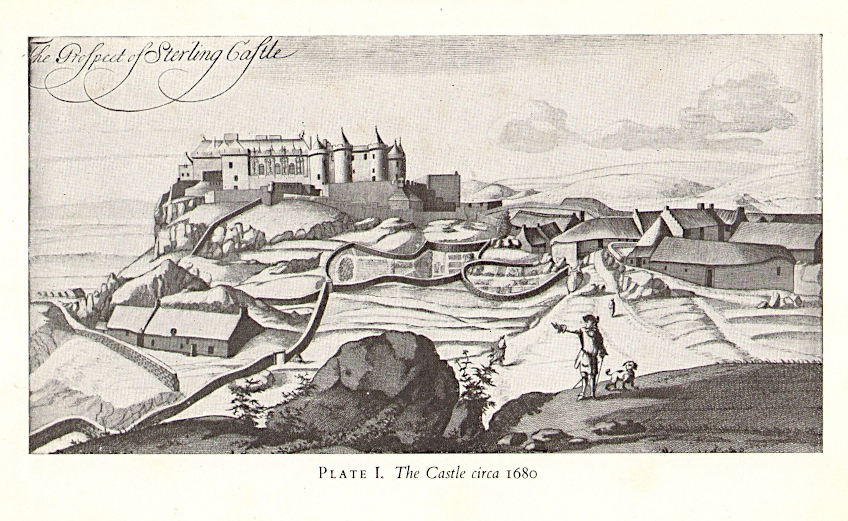 View of Stirling Castle by John Slezer (c.1680); J.S Richardson; Margaret E. Root (Margaret E.B. Simpson), Public domain, via Wikimedia Commons
News of this treaty would come to the immense chagrin of Robert, who understood that it would serve as a deadline that the English king could simply not afford to refuse. After sitting on his haunches for so long, King Edward II had no option but to amass an army and ride forward in aid of Stirling lest he wished to suffer the humiliation and dishonor that would befall him in court.
Robert the Bruce knew now that a battle against the English was inevitable, and that he would have to meet Edward II and his army in pitched combat to prevent relief from reaching Stirling. The consequences of Stirling’s salvation from the Scots would be immense, and it would likely undo all that he had done in the name of an independent Scotland.
The Scotland Battle of Bannockburn
As King Edward II rode to Scotland, amassing a mighty fighting force as he did so, Robert the Bruce drew his army several kilometers to the south of Sterling. By intercepting the English army, he would be able to prevent aid from reaching the besieged Stirling Castle and successfully purge the remaining English forces from Scottish territory.
A Comparison of Forces
According to the closest approximations of historians, it is estimated that the English army consisted of around 13 000 infantrymen, 3 000 cavalrymen on horseback, and a contingent of archers from Wales. The goal of this fighting force was to reach Stirling Castle to reprieve it from its impending capitulation. The Scottish army would meet the invaders in battle with nearly half as many men. Robert’s army was 7 000 strong and consisted primarily of pikemen with the remainder amounting to roughly 600 lightly armored horsemen. Although the jury is out on the exact numbers, he did also have a contingent of archers at the ready. He positioned his army within a tree line roughly one and a half miles from Stirling, adjacent to the Bannockburn river.
The idea behind the army’s arboreal positioning was to force any direct attacks directly into the schiltron formations of its heavy infantry and to funnel cavalry charges toward ditches that had been dug and camouflaged with tree clippings.
 Map showing troop movements on the first day of the Battle of Bannockburn; Andrei nacu at English Wikipedia, Public domain, via Wikimedia Commons
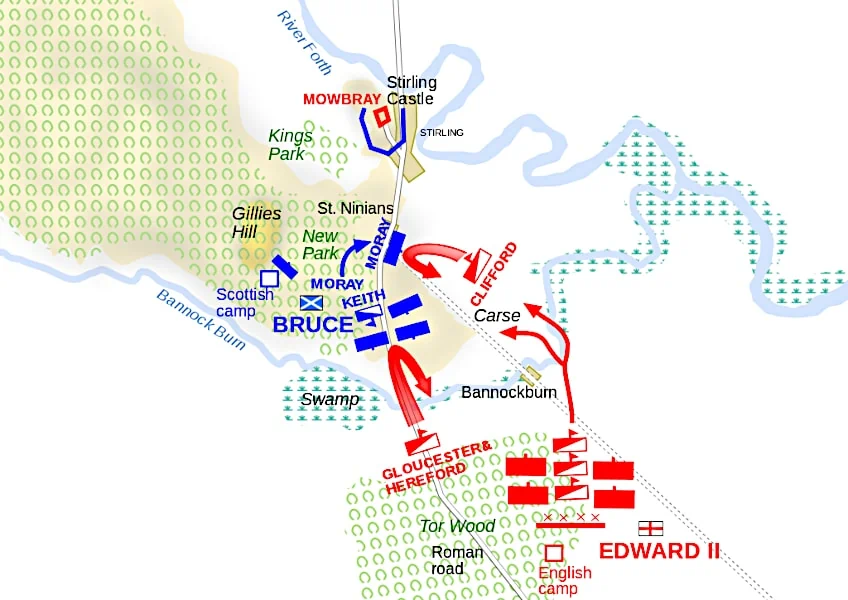
Events of the Battle: Day One
Edward and his vanguard would meet the substantially smaller Scottish army on the road to Stirling on the 23rd of June. As the kilometers-long column of the Earl of Hereford’s cavalry slowly forded the river, the Baron of Clifford approached from the far right to cut off any means of the Scots escaping toward Stirling. In the interim, Edward II and his contingents would remain on the other side of the river.
Hairbrained Hereford
Hereford and his men would find several contingents of Scottish infantrymen ready to meet them just before the treeline. When Robert the Bruce himself made an appearance at the front of the Scottish line to seemingly taunt them into a charge, Hereford’s nephew, Sir Henry de Bohun took the bait and launched a hair-brained charge toward potential glory.
Despite lacking the equipment requisite for mounted combat, Robert accepted the challenge and bore down toward the challenger whose lance was aimed in his direction. Inches before the pair reached striking distance, Robert used the superior agility of his mount to swerve at the last second. Perched up on his stirrups, Robert delivered a fatal blow to the knight’s head with his axe, which shattered upon impact.
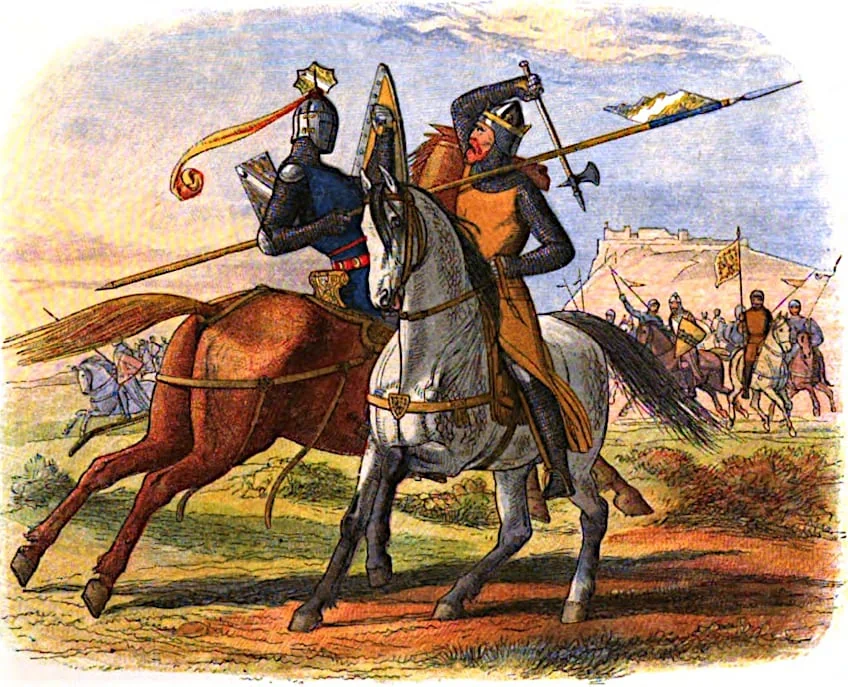 Illustration depicting Robert the Bruce killing Sir Henry de Bohun at the Battle of Bannockburn by Edmund Evans (1864); James William Edmund Doyle, Public domain, via Wikimedia Commons
Incensed by the death of his nephew and confident that the Scottish line would not survive the charge of his cavalry while on open ground, Hereford mustered his men in a dash toward their foes. At this point, Robert ordered his schiltrons forward in a position similar to that of the Roman Phalanx. The impenetrable column of Scottish spears would skewer many cavalrymen and horses alike. While his men suffered losses at the front, Hereford’s attempts at establishing a formation among his remaining cavalrymen were disrupted by the ditches the Scots had dug in preparation for their charges.
Clifford’s Contingent
Meanwhile, Thomas Randolph, the First Earl of Morey, noticed the English Baron of Clifford steering his contingent toward its intended flanking position on the Scottish left flank. With just about enough time on his hands, the earl mustered his contingents of schiltrons from out of the woods to meet the charging Englishmen before it became too late.
Standing shoulder to shoulder and bearing pikes with a long-reaching range of lethality, the Scottish schiltrons proved impenetrable against the charge of the English cavalry. And while Clifford’s knights struggled aimlessly to open up the Scottish position, Sir James Douglas led his contingent of spearmen out of the treeline and into the fray as a means to relieve Randolph and his men.
It is said that the English knights grew so frustrated with the absence of any permeability along the walls of the Scottish schiltrons that they began hurling their swords in vain hopes of creating an opening. But, with their numbers dropping considerably and fresh contingents of spearmen on the way, Clifford’s attack dissipated back to behind English lines, thus ending the first day of combat.
Events of the Battle: Day 2
Over the course of the night that followed the first English attempt at crushing the Scots, a Scottish knight in English service defected from his ranks and offered his counsel to Robert the Bruce, informing him of low morale amongst Edward II’s men. This would prompt Robert to call for an open-field battle on the following day. This time, it would be the Scots to charge in the direction of the English. Robert’s impenetrable schiltrons would push forward while his archers would distract the English bowmen away from his marching units.
With a lack of cohesion among the English troops, several noblemen decided to meet the schiltrons as they advanced, without first consulting with their king. This would lead not only their deaths but the deaths of many English cavalrymen whose lives would be consumed by the steadily encroaching steam engine-like advance of the schiltrons.
 Map showing troop movements on the second day of the Battle of Bannockburn; Andrei nacu, Public domain, via Wikimedia Commons
Firm Lines
What came to follow was a succession of charges of English cavalrymen, who were not yet ready to concede to the notion that they were simply unequipped with the weapons or tactics required to break the schiltron formations of the Scots. According to accounts of onlookers, it appeared as if the cavalrymen and their horses were being swallowed into an ocean upon reaching the front lines of the Scottish pikemen.
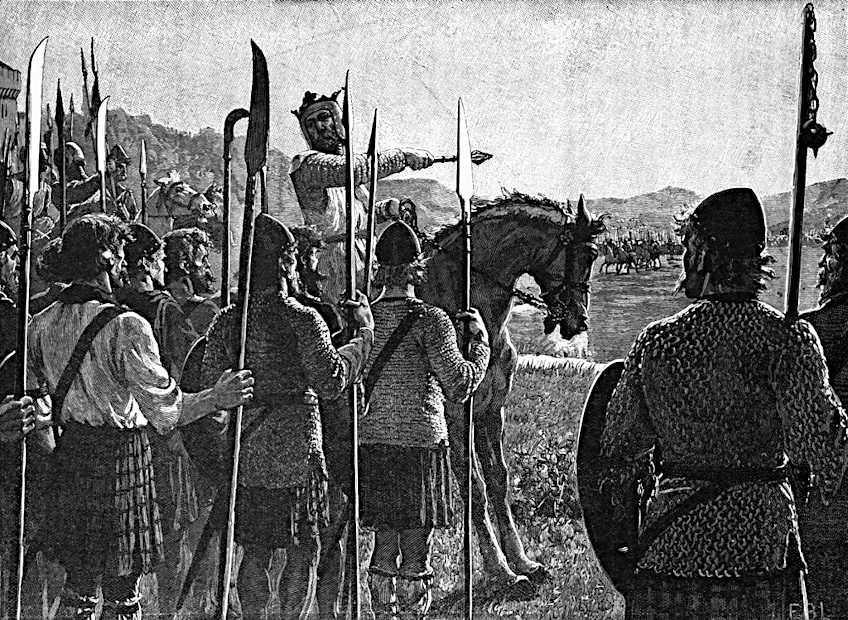 Illustration depicting Robert the Bruce and the Scottish at the Battle of Bannockburn by Edmund Blair Leighton (before 1907); Edmund Leighton, Public domain, via Wikimedia Commons
Unabated by the charging of Edward’s men, Robert’s army soon forced their foes all the way back to the Bannockburn River. Now seeing that the only feasible way of breaking the Scottish lines was to fire arrows in their direction, the English bowmen finally pointed their weapons in the direction of the schiltrons. However, with the gap between them now firmly closed, their arrows flew uselessly over the heads of the advancing Scotsmen.
At this point, too much ground had been given to the Scots, who now threatened to pin the English army between the Bannockburn and Pelstream rivers. The outcome of a Scottish victory now appeared inevitable, and the English nobility saw no more prudent a decision than to get King Edward II to safety.
The Routing of the English Army
Although defeat was, at this point, a sure guarantee, the 500 knights who withdrew to protect the English king’s escape stamped the seal on this fate. Upon witnessing the retreat of so many soldiers, a lack of discipline among the English ranks caused the remaining soldiers to begin fleeing as well. This would lead to the routing of English forces as they fled. As Edward’s men mustered their desperate escape, the assailing Scotsmen, heartened by their victory, would give chase and slay many more Englishmen.
Aftermath
Despite their numerical inferiority, the Scots would defeat the English and lose only 500 infantrymen in the process. The English, on the other hand, would lose roughly 4 000 foot soldiers and 1 000 cavalrymen. The defeat of Edward II’s army would allow Robert the Bruce to raid the north of England with impunity and would open the doors to his later invasion of Ireland.
After the battle Robert was able to ransom the English noblemen he had taken as prisoners at Bannockburn to rescue his wife, sisters, and daughter from English captivity. Most importantly, Robert the Bruce’s victory at Bannockburn earned Scotland its independence from England after the Treaty of Edinburgh-Northampton was signed in 1328.
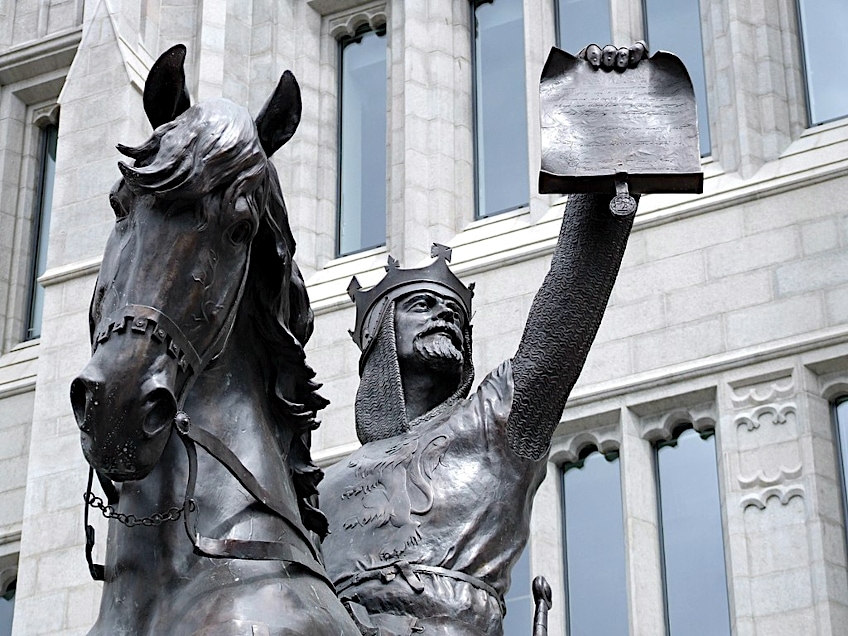 Statue of Robert the Bruce holding a charter by Alan Beattie Herriot (2011); L E X commons, CC0, via Wikimedia Commons
In conclusion, the road to the Battle of Bannockburn was complex and spanned the course of years. The primary goal that drove the Scots to victory was their desire to be free from English rule. The key factors that secured the Scots their victory over the English were the admirable leadership skills of Robert the Bruce, the unparalleled morale of the Scots, and the superior tactical prowess of their army. The battle is still heralded as a powerful symbol of Scottish independence to this very day.
Frequently Asked Questions
When Did the Scotland Battle of Bannockburn Happen?
The Battle of Bannockburn occurred between the 23rd and 24th of June 1314, and was fought between the Scots and an invading English army. Over the course of two days, the English army failed to break the lines of the Scottish schiltrons and was eventually forced to retreat after being defeated.
What Is the Significance of the Battle of Bannockburn?
The Battle of Bannockburn was a decisive victory for the Scots who defeated the English despite their numerical inferiority. This victory saw the reconsolidation of Scottish land that had been taken by the English, and won the Scots their independence.

I am deeply passionate about history and am constantly fascinated by the rich and complex stories of the past. As the editor-in-chief of learning-history.com, I have the opportunity to share this passion with a wide audience through the creation and distribution of engaging and informative content about historical events, persons, and cultures. Whether it’s through writing articles and blog posts or creating videos or podcasts, I strive to bring the past to life in a way that is both accurate and enjoyable. My expertise in history, combined with my strong writing and communication skills, allows me to effectively communicate complex historical concepts and make them accessible and interesting to a wide range of readers. I am truly grateful for the opportunity to share my love of history with others through my work on learning-history.com.